 DIY Audio
Headphone Amplifier
This is an extension of a post I put on DIYaudio.com forum so I could collect thoughts and responses as I implemented a design for a headphone amplifier. Then I can paste some images as I go along … and in turn link back to this wordpress and put images into that article. Its part of the cycle of engineering where you build it but then refine or seek to understand, do better in future.
Why build a headphone amp – mostly just to play with one since I haven’t had anything like that in a long time and I never DIY built one. I’ve done various opamp and amp based things this is several things in one.
What follows is from the forum
“I’m creating this thread for someone who, like me, may have built this
Which is actually supplied not by the good guy who runs that excellent DIY electronic audio site.
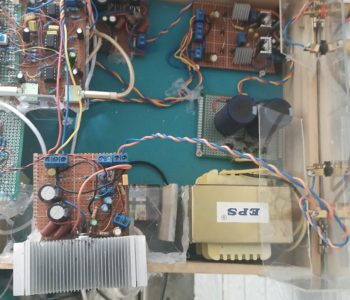
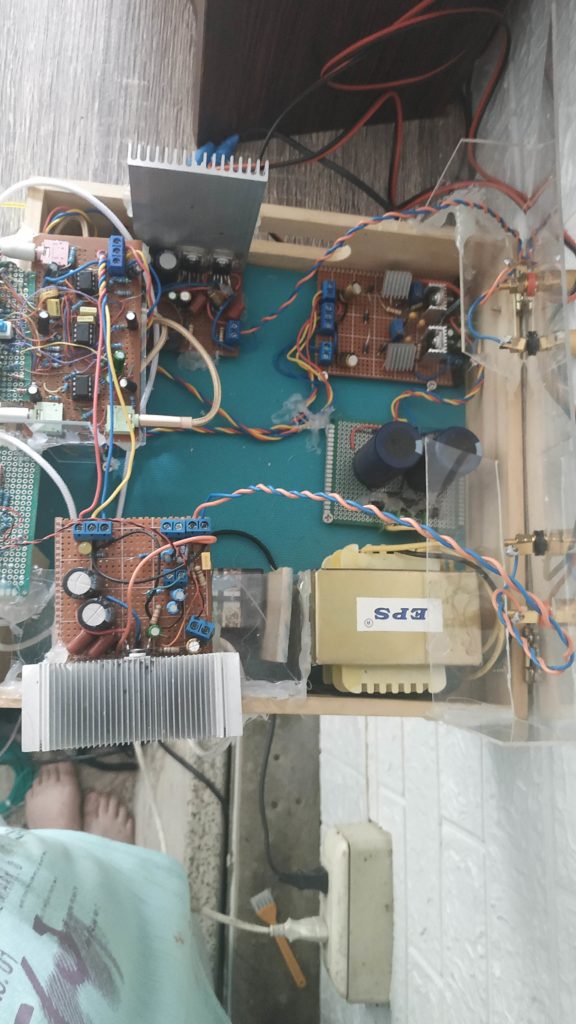
So – i’ve built about 6 amps and this was my first headphone amp. First I just built the smallest power supply that fit the needs.
They list it as needing 500ma transformer 15-0-15, but I used a 300ma and just built a small simple 7815 +7915 regulator tiny thing. Then tapped into the pre-regulator for the 22+ 22- volts lines. However, since it’s such a ****-weak transformer I end up with about 19v DC stable.
Its supposed to be a Class A … which I never made yet, I made a few ClassAB and bridged sub type things LM3886 TDA2030 LM386 and so. LM386 with a push pull booster. This was my first class A as far as I understand.
Initially, because I’m lazy i was made to pay for not putting stabilizing caps on the un-regulated supply when I started testing the complete thing. So what happened was that a comedy of errors and bugs caused me to burn out one pair of BD139 BD140. When that happened the voltage really dropped as they went low resistance internally. It also burned up one driver (i was only running one side testing one channel) of my headphones.
I believe that I just had too much gain and because I didn’t have caps it went into oscillation hell and killed itself. I don’t have a working oscilliscope yet – i used a toy thing but that broke. So I just used my multimeter to decide I killed the power transistors.
So … i ended up removing the arbitrary 20k resistors I put for feedback/gain on the first stage NE5532 (i didn’t have NE5534 so I just used a single NE5532). So that’s my first question – is a single NE5534 important – much better?
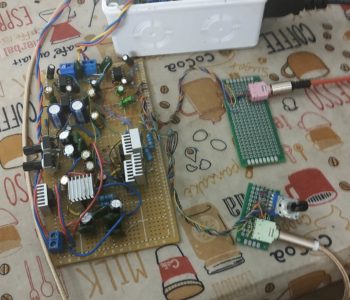
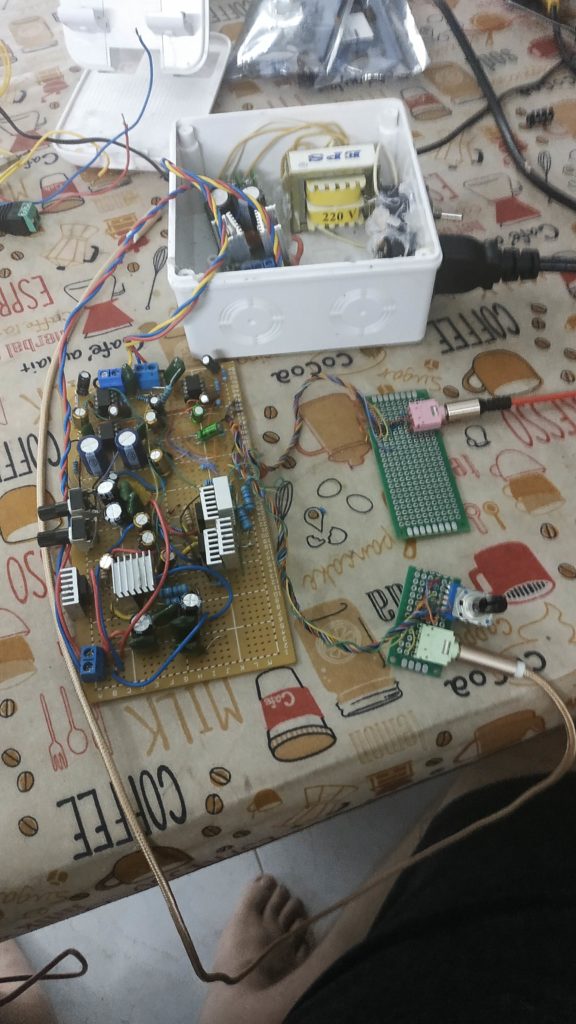
The gain on this is super important in this design from what I can tell .. so I put 2 pots so I could “adjust on test” as it said (which threw me, first time I saw that). I ended up having 0 resistance on the feedback gain (output to inverted input) so that when I replaced the power transistor push pull stage with new parts it would be more stable. I put 47uF and 100nf from the +22 to ground and the -22 to ground rather than just crossing + to –
I’m thinking maybe I should also put a bigger cap across the input between + and – unregulated input.
The opamp parts always seemed to work fine because I did, from experience, put bypass caps and resistors to their power rails. One each rail of each op amp chip. I know that you just have to do something to stabilize them or they can die quite easily (or at least NE5532 can).
Anyway – it works with all those extra caps – I did 8 caps to run the power for the 4 BD1xx transistors. I didn’t put a “base resistor” for stability because it’s not in the design and I didn’t want to mess with the biasing. I do think that it would be better to put resistors (or even zobel) between the final output and the biasing network that feeds the base of the power transistors. I haven’t tried that.
This amp is split power so it doesn’t call for an output capacitor – it just goes directly out to the headphones with 10 ohm resistors to split to two outputs. I put a switch with a zobel network of just resistor cap to ground so I can turn it off/on. I did this figuring that maybe it will reduce chance of heating up the driver if something goes wrong again and it oscillates. After I damaged my headphones I tested with transformer (600/600) between headphones and amp (that I use for isolating various things from amps when testing or just generally) After that seemed like the amp was running ok it obviously sounds way better to run headphones direct from the amp … with a signal from a phone headphone jack out … line out through transformers it seems to make little difference. With headphones it makes an enormous difference – losing tones of power and clarity. Makes sense … but I’m not an expert.
So – my zobel network is a bit odd – its 100 ohm 6.8nF. Not 10 ohm 100nf like most people use … why? Well it just doesn’t make a lot of sense to me that a headphone amp would need the same as 4-8 ohm speakers need.
I also read this High speed amplifiers for audio
It suggests interconnect zobel can make sense and even pushes for even lower values.
So why is that relevant – to my mind the op-amp output is part of what goes direct to the headphones. Its mixed with the power stage … probably to supply the lowest voltage on for whatever is lost in crossover wave gap.
The biasing network makes it such that 0.7v +/- is already present at the base so you shouldn’t get much to trigger the amplification of the + and – swing of AC signal – ie negligible crossover distortion but what might be present is replaced with the op-amp signal of the pre-amp or maybe its a driver. Its an active volume (bandaxall) op-amp design what has a voltage follower into a final amp supposedly giving a gain of 10. This would be why putting too much gain is a big mistake.
So my idea was that the zobel network is also dealing with the opamp driver signal and not just the output push pull stage so decided to use something oriented at reducing high frequency distortion (reactance related). I am happy for people to tell me why I’m wrong and if it makes sense or not to experiment with zobel network values.
I also saw a zobel network calculation for 68 ohm resistance + 1nf (ceramic cap) suggested. That would sort of match a 68 ohm resistor between the biasing diode and the base of the push pull amp so I think that kind of zobel network would be something that goes between the opamp driver and the input to the push pull part of the headphone amp. I think anything to reduce distortion on high frequencies is going to be a good thing. I don’t know that I can perceive high frequency distortion but later if I use high impedance headphones (that I don’t own now) maybe it would start to matter as the amp has to work harder.
I really just built this because sometimes music or video sources of sound from the PC are weak and I craved having an active but clean way to boost my headphone signal.
What I can say is that the bass is quite similar to the unamplified signal but it sounds more full and dynamic. What you seem to have from just the PC sound card is an adequate but hollow (compressed) reproduction but the amp seems to expand (decompress) in some cases the dynamics again. That would indicate that the compression is a function of not being strong enough to drive the headphones (even low impedence 30 to 40 ohm headphones) so it can make the tones but not reproduce the dynamic envelope of the notes as recorded. Other than this the DAC from the PC sound card is not bad sounding for an “on motherboard” one. I think DACs matter and of course I want to do a dac project can fit that with this amp. I am capable of digital electronics projects – so maybe I’ll try that some day. Or I’ll just buy some DAC chips and integrate them into another amp and have a USB to headphone amp thing.
So other oddities – the first gain stage if you use 0 resistance from out to inverted pin you get a hiss. When you add some resistance (and thus gain) the hiss goes away. So this is why it says “adjust on test” – you need some but not much gain before it goes out to the active volume control.
My active volume runs a bunch of tiny hookup wires to a stereo pot – so there is extra wire distance so I could run the volume to a different part of the case. If I designed another I’d put the stereo pot on the circuit board.”